Organizing Jewelry: 10 Creative Hacks for Your Home
Do you have a lot of pretty bracelets, necklaces, rings, and earrings? Keeping them organized can be hard. But we have some fun and easy ideas to help! You just need a few simple things around your home. Once you try these tricks, your jewelry will look nice and neat without a jewelry box.
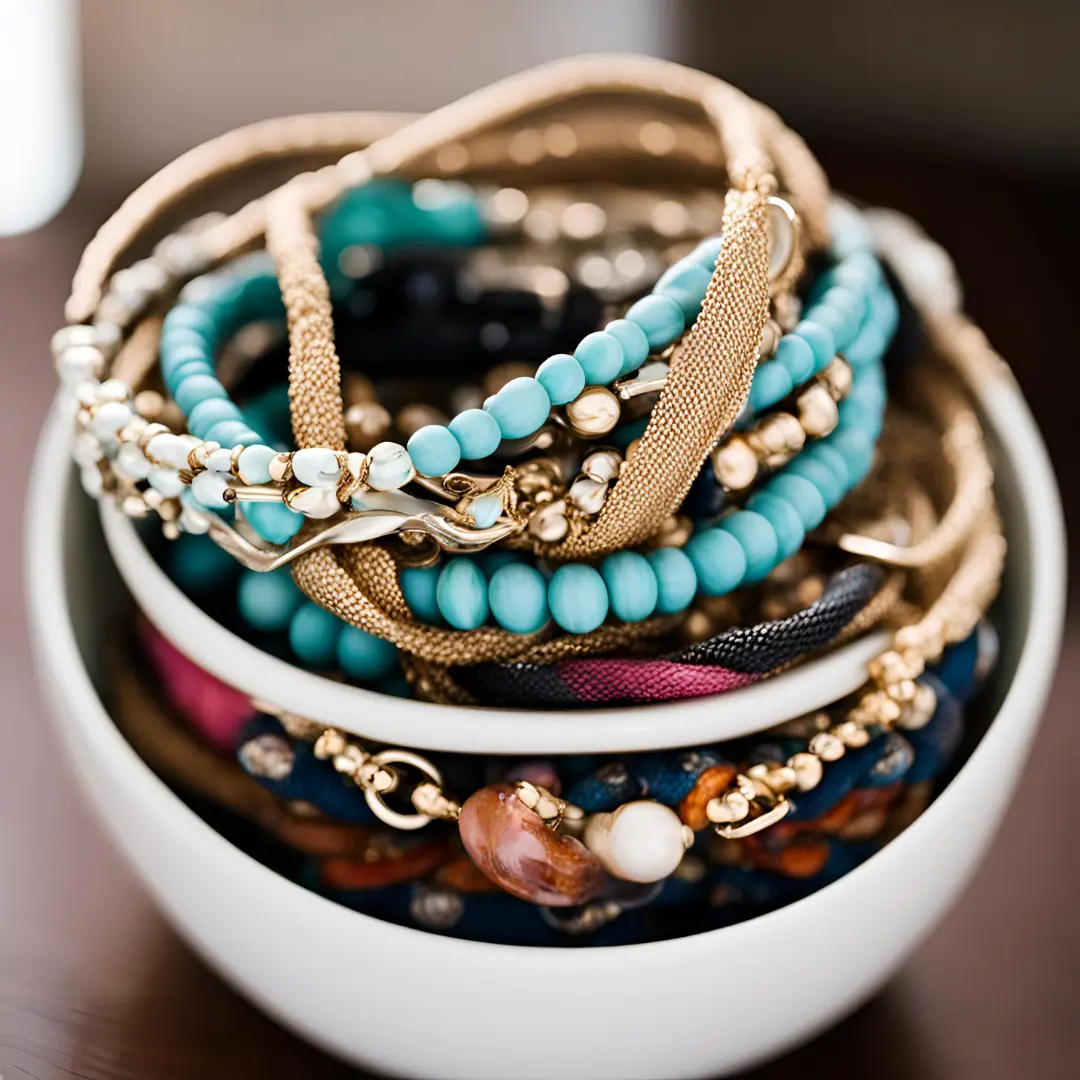
1. Organizing Bracelets (Bowl for Bracelets):
One easy way to keep your bracelets together is in a pretty bowl on your dresser. Just stack them up inside! Look around your home for a nice bowl that you don’t use for food anymore. It can be made of glass, ceramic, metal, or even plastic. Choose the one which have a wide opening at the top so that it’s easy to reach in and grab your bracelets.
You can put all your bracelets in the bowl, including big and small. The bigger bangles can go on the bottom. Then stack the smaller, more delicate bracelets on top. This way, they won’t get tangled up.
If you have a lot of bracelets, you may need a really big bowl! Or you can use two smaller bowls – one for thicker bracelets and one for thin ones.
To give it more fancy look pick a bowl with a color or pattern you like. It will make a nice decoration on your dresser. And all your bracelets will be together in one easy spot when you want to wear them.
Having the bracelets contained in a bowl helps keep them from rolling around loose. The bowl sides will stop them from falling off the dresser too. Just be gentle when taking bracelets out so you don’t knock the whole stack over!
2. Organizing Necklaces (Wall Hook):
You can hang your necklaces on the wall. All you need is to get some cup hooks. These are the small hooks with a little curved shape. Get some help from parents to screw the cup hooks into the wall or wooden board that you painted with most favorite color.
Now space the hooks out across the wall or board so that there is a room for each necklace. If you don’t want them too squish together. Remember to screw the hooks in very tight so they are secure from falling out.
It’s time to hang up all your necklaces on the hooks. Take the 1st necklace and gently loop the chain over the cup hook. Let the necklace pendant dangle down and give it a tug to make sure it is secure on the hook.
Do the same thing for each necklace hanging one necklace on each hook. Put the longest necklace on the highest hooks and the shorter necklace chains from the lower hooks.
3. Vase for Necklaces:
Look around your home for a vase that is tall, and sturdy with a wide opening at the top and won’t easily tip over with the necklace weight. It can be made of glass, ceramic, plastic, or even metal.
Take the 1st necklace and drape the chain over the top edge of the vase. Let the necklace pendant and hang down the front side. Give it a tug so that it doesn’t slide off.
Do the same thing for the next necklace. Now the pendants will hang down the vase front side by side. Keep adding the necklaces to the vase one by one until you can’t fit any more chains over the top. In this way the all the charms dangle down the front in a decorative cluster. Keep in mind if you have a lot of necklaces you may need a big tall vase.
4. Towel Holder for Necklaces and Bracelets:
Look around your home for a special towel holder made just for hand towels. It will have two straight rods sticking out from it – one rod on the left side and one rod on the right side. They make great organizers for your necklaces and bracelets!
For your necklaces, unclip the necklace chain first. Then carefully drape or loop the chain over one of the rods. Let the necklace pendant or charm dangle down from the rod.
Do this for each of your necklaces, spreading them out across the rod. The longest necklaces can go on the ends and the shorter necklaces can go in the middle.
Now for your bracelets! The bracelets can hang on the other rod. Big, thick bangles can just slide right over and rest on the rod. But smaller, thinner bracelets may need to be clipped first before hanging on the rod.
Make sure to leave a little space between each necklace and bracelet as you hang them. You don’t want them too squished together and tangled.
The towel holder rods will keep all your jewelry pieces neatly separated in a row so none of the chains and bracelets get knotted up. And they’ll look so pretty hanging there for you to admire!
5. Organizing Rings and Earrings:
Look in your kitchen for an ice cube tray with lots of little square spaces to hold ice cubes. These small square spaces are the perfect size for holding rings and earrings! You can use an ice cube tray when you no longer need for making ice.
Place each ring into its own little square space. The rings will fit snugly inside and stay separated from each other so they don’t get scratched.
For your earrings, you can put the studs into the square spaces. If you have dangling earrings, you may need to let the dangly part hang over the edge a bit.
When you fill up all the spaces in one ice cube tray, you can get another tray and stack it right on top! The trays will lock together. Keep stacking more ice cube trays with rings and earrings until all your jewelry pieces have their own space. The trays will look like little plastic storage drawer boxes!
6. Muffin Tin for Jewelry:
Another container that works great for storing your jewelry is a muffin tin which is used for baking muffins or cupcakes. The round spaces in a muffin tin are perfect for holding rolled up necklaces, bracelets, and earrings! Look for a muffin tin you no longer use for baking.
For your necklaces, straighten out the chain and then carefully roll it up into a little coil. Place each rolled necklace into its own muffin tin space.
With bracelets, you can roll up the smaller, flexible ones and set them in the muffin tin spaces too. The bigger, rigid bangles may need to rest across two spaces side-by-side.
Earrings can also go in the muffin tin! Place the stud earrings directly into the spaces. For dangling earrings, let the dangling part hang over the edge a bit.
If you have a lot of jewelry, you may need to use two or three muffin tins to fit everything.
7. Over-the-Door Organizer for Necklaces:
Find a clear plastic organizer that hangs over the top of a door. These pockets are great for holding your bigger necklaces too! Hang the organizer on the wall instead of a door. Use the bottom pockets to store your big, decorative necklaces.
After putting each necklace in its own pocket, you can fold the top of the pocket over to close it. This will help keep dust away from your necklaces. Use clear plastic pockets let you easily see all your necklaces.
8. Makeup Sponges for Rings:
Find some soft, squishy sponges used for putting on makeup. Take one sponge and squeeze it gently to make it smaller. Then stuff the squeezed sponge down into the circle part of one of your rings. The sponge inside the ring will help keep it safe and protected.
Do this for each of your rings. Put a piece of sponge inside to hold its shape. After putting sponges in all your rings, you can place them together in a small box to store them.
The sponges stop the rings from getting scratched up. And the flat sponge bottoms make the rings stand up in the box instead of rolling around.
9. Picture Frame for Earrings:
Get an empty picture frame. Take out any glass or pictures inside. Find some chicken wire. This is a mesh metal wire material. With help from a family members, stretch the chicken wire across the back of the picture frame. Make sure it is pulled tight. Now you can hang your earrings from the chicken wire!
Once all your earrings are on the wire, you can hang the whole picture frame on your wall. Your earrings will be neatly displayed like a decorative art piece!
10. Bottle for Bracelet Tower:
Find an empty glass bottle, like an old soda or juice bottle. Make sure it is cleaned out. Take your first bracelet and carefully slide it over the bottle neck and down to the bottom. Then take your next bracelet and do the same – slide it over the bottle neck until it stacks on top of the first bracelet.
Keep adding bracelets one-by-one, sliding them over the bottle neck to stack on top of each other. The bracelets will form a tall, pretty tower around the bottle!
Conclusion:
Organizing jewelry does not have to be difficult. Look around your home for items you already have. Get creative with these and you can make pretty ways to store your jewelry yourself!
Try out some of the ideas from this list. They will help you keep all your special necklaces, bracelets, rings, and earrings organized. No more tangled messes! You may like to read our tips on sustainable eco-friendly home decor.